| Exercise | FME and ArcGIS WebHooks |
| Overall Goal | To show how FME and ESRI Webhooks can be used together |
| Demonstrates | Passing a call from ESRI into an FME Webhook |
| Completed Workspaces | C:\FMEData2020\Workspaces\IMGS_ArcGIS\Webhook_A_Complete.fmw C:\FMEData2020\Workspaces\IMGS_ArcGIS\Webhook_B_Complete.fmw |
ESRI provides the ability to pass a message to an external service when an action occurs within the platform either though Survey123, but in the latest versions it is also possible to add webhooks to feature classes. The following exercise will walk through the typical process of linking FME to the ESRI environment via web hooks to allow FME to process data.
In this example we will work with a sample feature class from an Asset Inspection application and look to create a survey report for each asset survey that is created. The exercise takes a microservices approach when constructing the automation so that the processes can be compartmentalised and therefore extended in future.
Create Workspace to Process Webhook's.
The first step of the exercise is to build the workspaces that will take the webhook information and turn this into a feature we can work with.
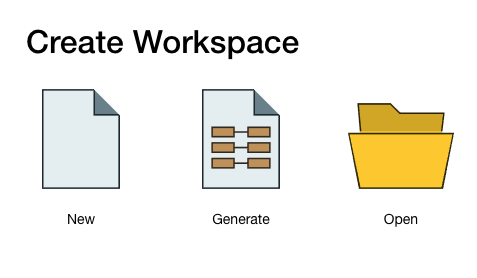
1) Create a New Blank Workspace
Open FME Desktop and select New to create a new blank canvas.
In Workspace create a new parameter as shown below.

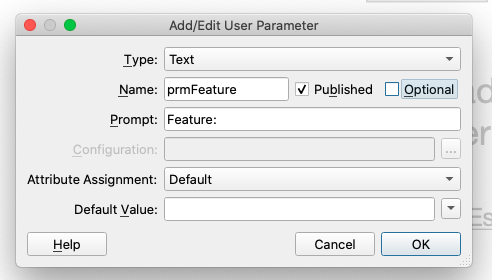
2) Set-up Published Parameter
Create Text Parameter and configure as below.
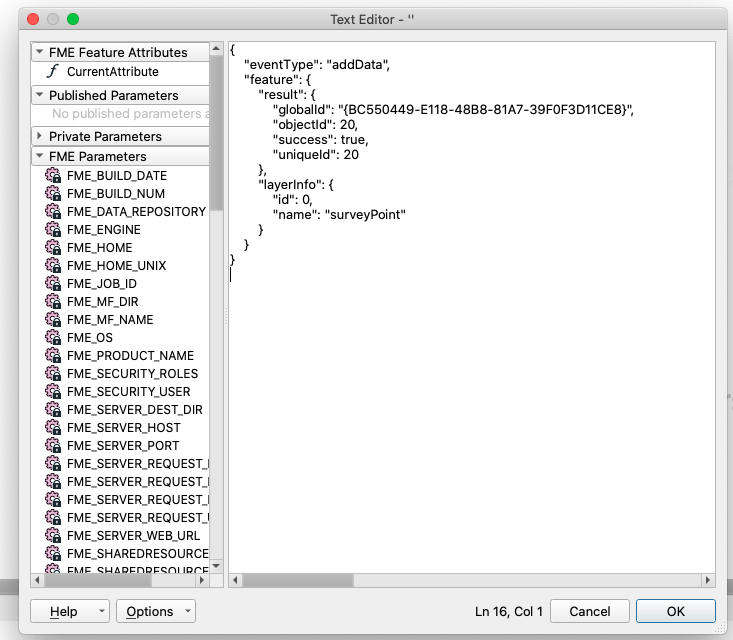
Within the Default Editor add the following text to create a dummy feature for the Workspace development.
{
    "eventType": "addData",
    "feature": {
        "result": {
            "globalId": "{b2e49279-8168-4832-a6c9-8ea09534f92e}",
            "objectId": 20,
            "success": true,
            "uniqueId": 20
        },
        "layerInfo": {
            "id": 0,
            "name": "surveyPoint"
        }
    }
}
IMPORTANT: A text snippet of the above is also available in the location below, however please update the globalID to b2e49279-8168-4832-a6c9-8ea09534f92e within the Snippet's text.
C:\FMEData2020\Resources\IMGS\ArcGIS\survey123_webhook_event.json
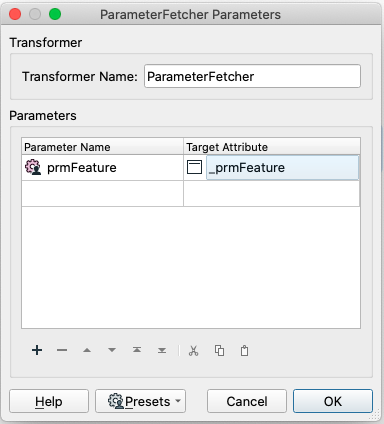
3) Bring Parameter into the Workspace
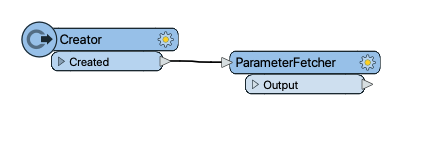
Add a Creator transformer, and then connect a ParameterFetcher transformer.
In order to ensure that FME pulls the Parameter value we are using into the Workspace for use in the subsequent transformers we can use the ParameterFetcher. Whilst many transformers support direct use of a published parameter this can occasionally be temperamental in which case the parameter fetcher pulls the parameter into an attribute that can be explicitly used within the workspace.

Configure it to bring back the published parameter into an attribute as shown.
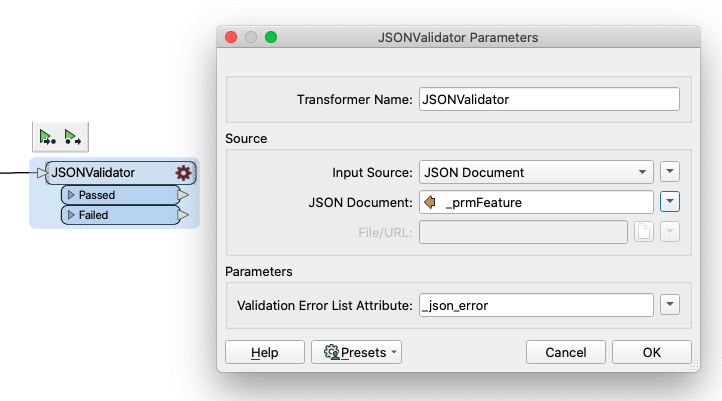
4) Validate JSON
As the JSON is coming from a relatively unknown source we want to check that it is syntactically correct before progressing any further with processing the data. To do this we can use the JSONValidator.
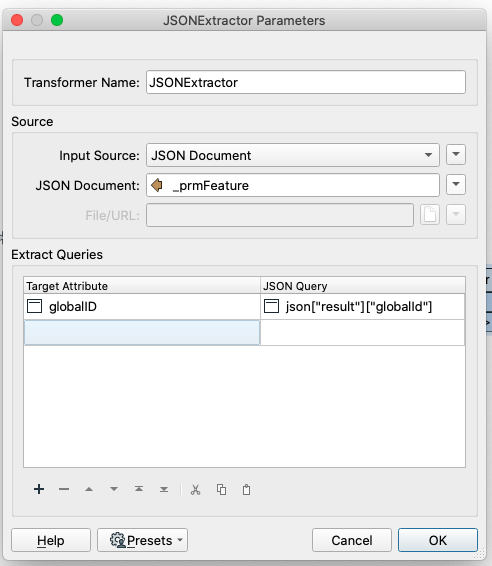
5) Extract the GlobalID
As we are taking a modular approach to building our automation workflow at this stage we will extract just the GlobalID from the incoming message. We will pass this GlobalID into another part of the automation to carry out the Feature extraction.
Add a JSONExtractor and configure its parameters to use the JSON feature created above. Create a new Target Attribute called globalID with the following JSON Query: json["result"]["globalId"]
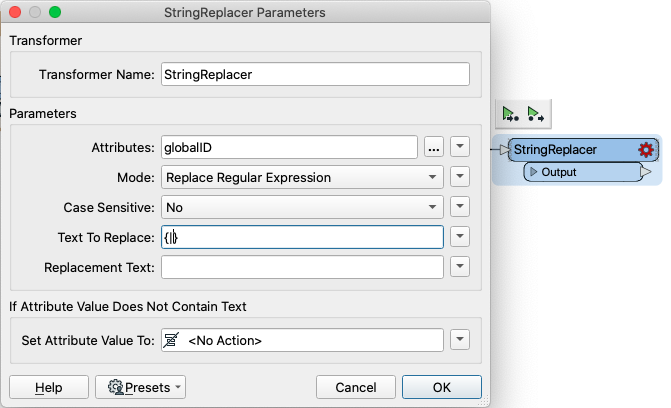
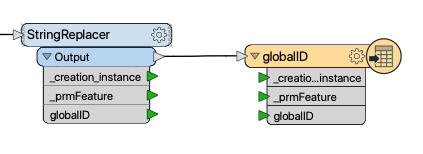
6) Remove Braces on GlobalID
The GlobalID has braces ({}) around the value, these are not used by FME in when reading the data in so to ensure that the value can be used we will use the StringReplacer to remove these.
To do this in a single transformer we can use its Regular Expression support with the following RegEx statement {|} as below.
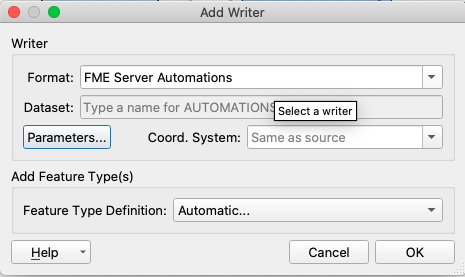
7) Add Automations Writer
In order to pass the information to the next part of the automation we can use the Automations Writer. This is a fairly simple writer as it will pass the attributes it is given as a JSON message to the next part of the workflow connected to it.
So we can add the Writer
Then give the Feature Type the name globalID.
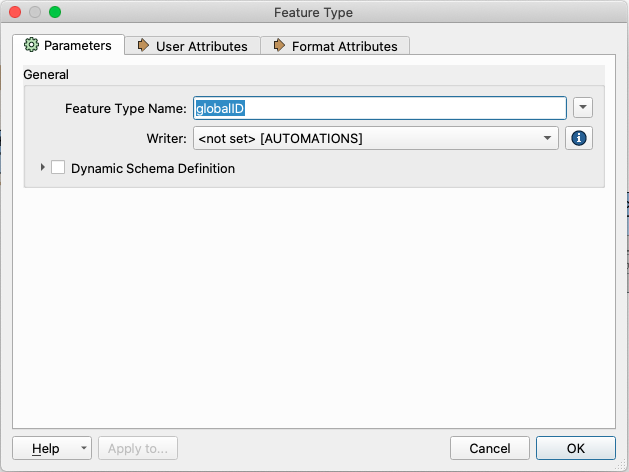
We will leave the attribute definition to automatic so this will pass all the attributes a feature has.
8) Save and Publish the Workspace
Save the Workspace and publish it to FME Server to a new Repository.
If you have not created a connection to FME Server the details for the Server are stored in a text file on the Desktop or ask your training instructor.
Create the Report Workspace
9) Create a New Blank Workspace
Open FME Desktop and select New to create a new blank canvas.
In Workspace create a new parameter as shown below.
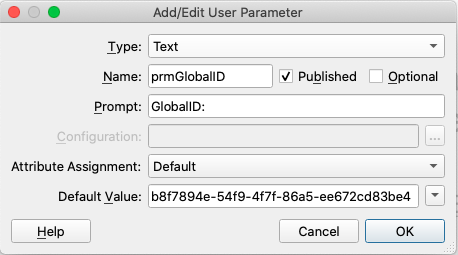
Create a new parameter call prmGlobalID as below. Set the Default value as b2e49279-8168-4832-a6c9-8ea09534f92e
Repeat the same workflow in the first workspace to bring the parameter into the workspace by using a Creator and a ParameterFetcher transformer.
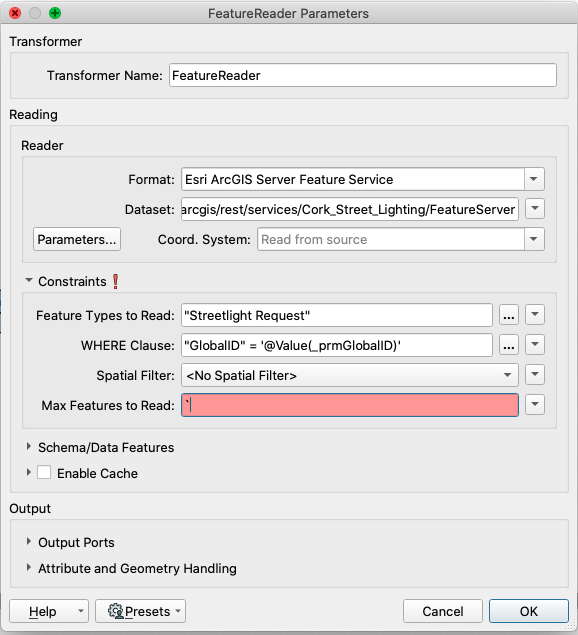
10) Read in our target ArcGIS Online Layer
Add an Esri ArcGIS Server Feature Service reader, and set the Dataset to the below:
https://services9.arcgis.com/glE7xGfyMSglZALu/arcgis/rest/services/Cork_Street_Lighting/FeatureServer
then set the Feature Types to Read to: Cork_Street_Lighting
Lastly set the WHERE Clause to: "GlobalID" = '@Value(_prmGlobalID)'
(modify the attribute to match the one you created in the first step if different to this one).
By setting the WHERE clause we can ensure that we only read the feature we need from ArcGIS Online and therefore minimise the amount of information we need to bring across the network. By filtering the data upfront it is more efficient than reading all of the data in and then using a Tester for example.
Run the Workspace and you should see we return a single feature from AGOL.
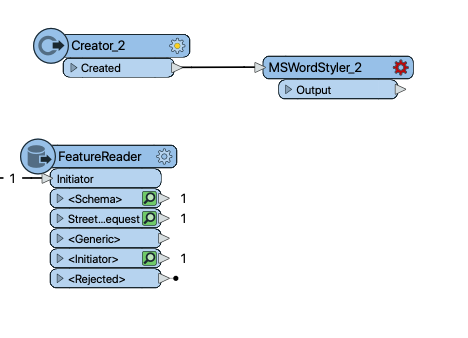
11) Create the Report
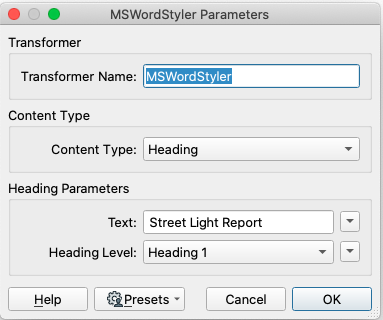
The first step is to add a second Creator and a MSWordStyler transformer as shown.
Configure the MSWordStyler to create a Header with a suitable value as below.
Once configured right mouse click and select Add Attribute from the context menu.
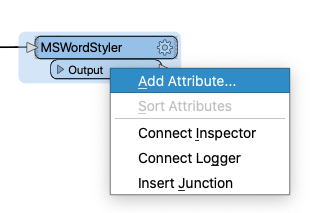
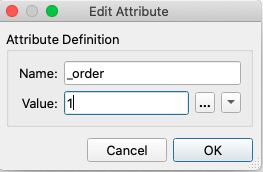
Create a new attribute called _order with a value of 1. This will be used to control the sort order to ensure that the Heading will be the first feature in the report.
Add a second MSWordStyler and connect it to the Streetlight Request port on the FeatureReader transformer.
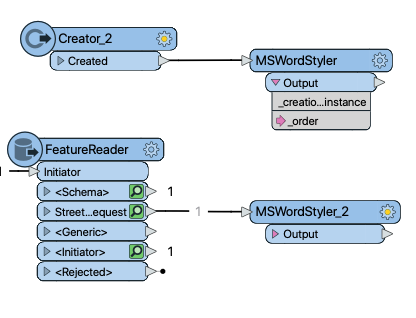
Repeat the step above to create the _order attribute setting the value to 2.

Having brought the feature in, we have all of the attributes available to present in our report. In the new MSWordStyler set the Content Type to Table and then configure the settings to create a table as shown below.

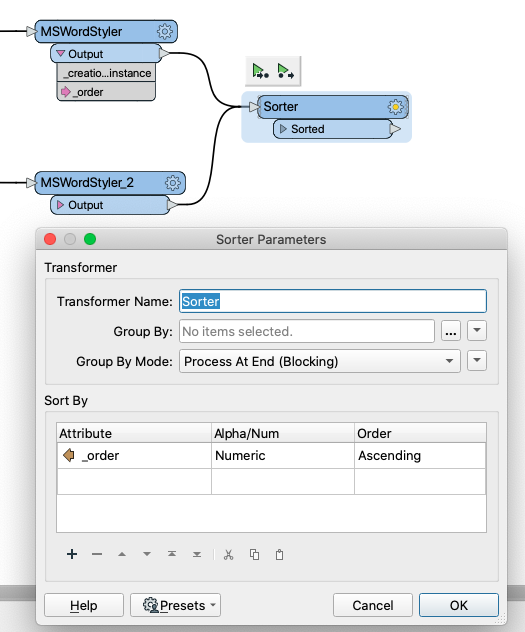
12) Sort the Data
Add a Sorter transformer and connect both of the MSWordStyler transformers to it. Then use the _order attribute to numerically sort the features in ascending order.
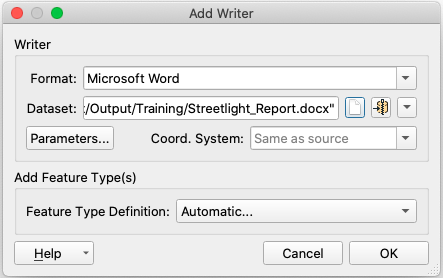
13) Add a Word Writer
Add a Word writer connected to the Sorter. For now we can write the data out to the Output folder in the FMEData2020 folder.
This is currently a very basic report to prove that our workflow works correctly, once we have proven everything connects together we could extend this workspace to build a richer report with more detailed information about the assset.
14) Save and Publish the Workspace
Save the Workspace and Publish to FME Server as before. For simplicity publish next to the previous workspace.
Create the Automation
Having created the required Workspaces we can build the automation to execute them.
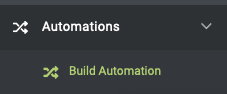
15) Create an Automation
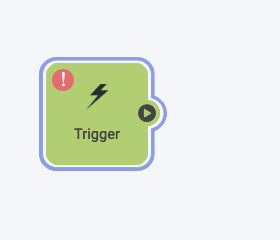
Log into the FME Server on your training machine and go to Build Automation to add start a new automation.
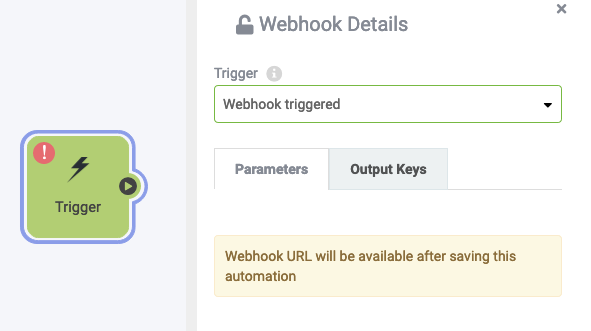
On the automations screen click on the trigger that is added by default.
From the Automations menu on the pop in select Webhook from the list of available triggers.
16) Create Output Keys from JSON Message
The message from ESRI contains too much information to be able to drill down to the level we need but we can focus on bringing in just the part of the message we need for use within the rest of the automation.
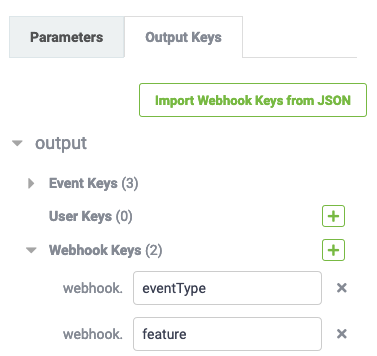
Select the Webhook trigger and select the Output Keys. This select the tab that controls the values FME passes from this action to downstream actions.
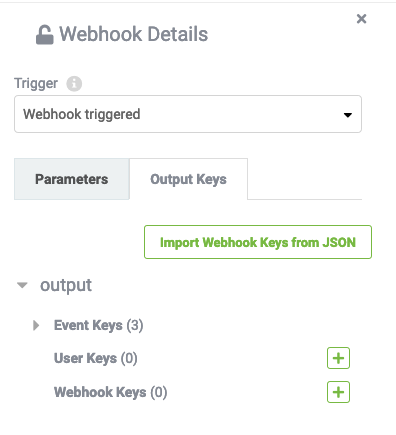
Click on Import Keys from JSON and add the following into the pop up panel.
{
    "eventType": "addData",
    "feature": {
        "result": {
            "globalId": "{BC550449-E118-48B8-81A7-39F0F3D11CE8}",
            "objectId": 20,
            "success": true,
            "uniqueId": 20
        },
        "layerInfo": {
            "id": 0,
            "name": "surveyPoint"
        }
    }
}
A text snippet of the above is also available in the following location.
C:\FMEData2020\Resources\IMGS\ArcGIS\survey123_webhook_event.json
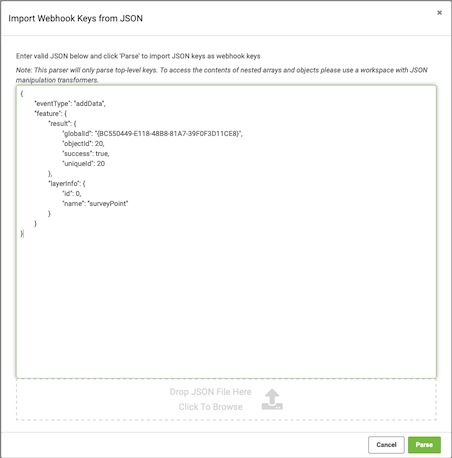
Once added click on Parse.
17) Connect a Workspace to the Automation
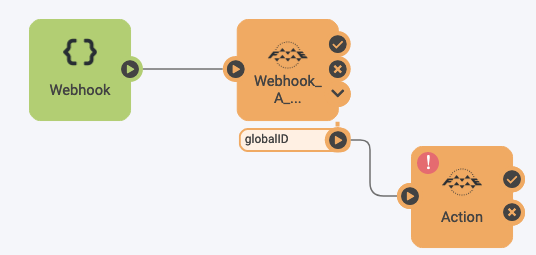
Add an Action to the Trigger and connect the two together as below.

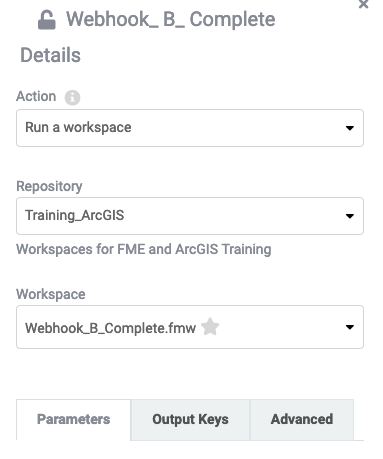
Set the Action to Run a workspace and the Repository to the one you created above. The Workspace is set to the first of the two workspaces you created above.
From the Parameters tab below set the Feature Published parameter to the webhook key that was created in the webhook trigger as shown below.
This step passes the key created in the webhook into the published parameter of the workspace and is one way FME passes information between the different elements of the automation.
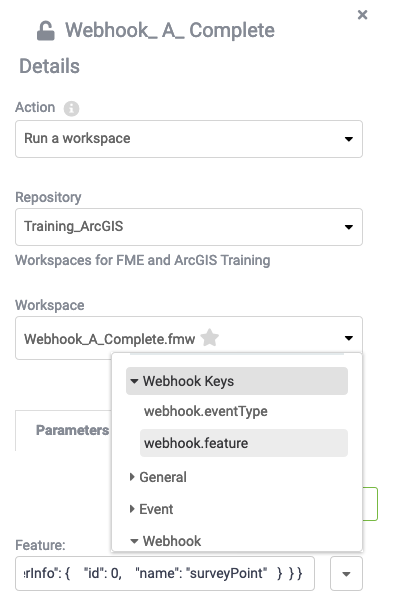
Clicking on apply will apply the setting and you should also now see the automation port from the action based on the workspace we created earlier as below.
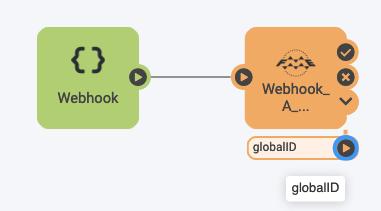
Connect a second action to the Workspace action but this time connect it to the automations writer port, in this case called globalID. This will mean the attributes from that writer in the workspace will be passed to our second workspace.
18) Configure Report Workspace
Having parsed the incoming webhook message and identifying the GlobalID we want to report on we can now configure our report workspace created above.
Set up the second action to point to our reporting workspace.
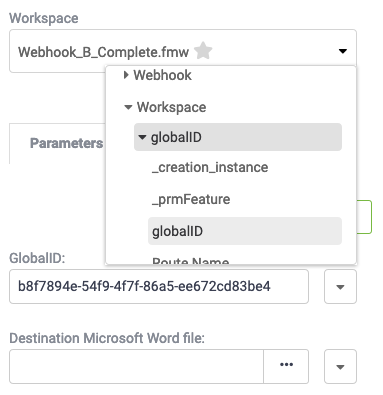
For the GlobalID published parameter set it to the globalID attribute key as shown below.
Be aware the first globalID shown is the port/feature type and the second is the attribute so ensure to expand the options to pick the correct one.
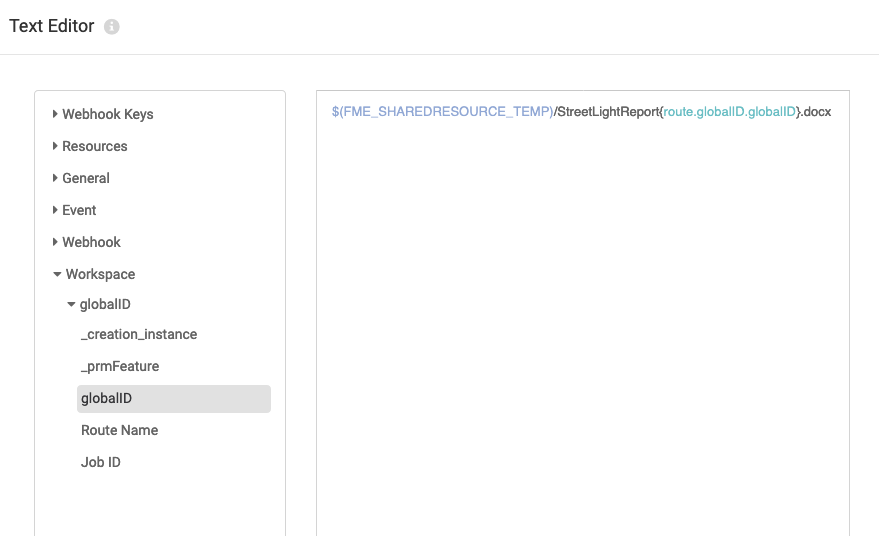
Now we need to configure the output location and report name for the Word writer. Click on the three dots to the right of the parameter to open the file dialogue. We will use the Temp folder on FME Server so click on that to open it.
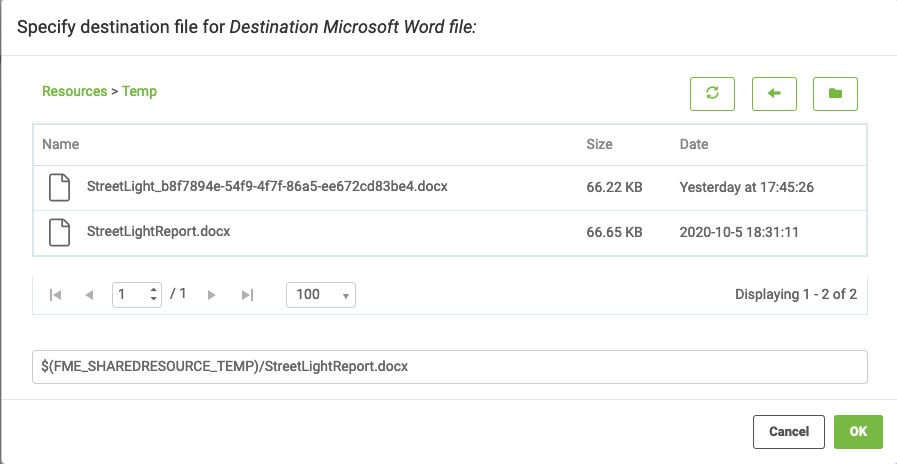
However we want to create a report per asset so we want to include the GlobalID into the output name so we get individual reports. Click on the drop down option to the right of the Word Parameter and select Text Editor.
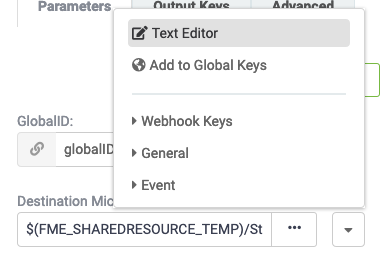
The text editor works in a similar manor to the one in Desktop so use this to add the GlobalID to the output filename.
The globalID attribute can be used that is found under Workspace -> globalID as shown below.
19) Start Automation and Retrieve Web Hook
Click on Start Automation at the Top Right to start the automation running. You will be prompted to save the automation if you have not already done so.
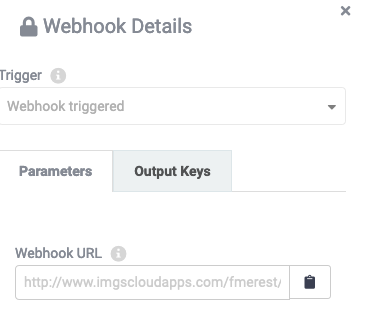
Once the automation has started, click on the Webhook trigger. This will now display the Webhook URL. You can click on the copy icon to make a copy of the URL to the clipboard.
Testing the Automation.
Having built the Webhook we can now test this, obviously we could put the URL into Survey123 etc to test but this introduces additional failure points when we want to confirm that the FME logic works first.
As a first step we can therefore call the Webhook directly to test that FME performs in the way we expect. We can do this with FME and the HTTPCaller but we can also use the PostMan API tool. This tool provides a robust method for doing so and allows us to save the tests for future use as well.
Postman is a REST client tool. REST client tools allow a user to enter in a Request URL and receive messages directly from the server. This exercise demonstrates the health check call which will check if FME Server is up and running properly.
We are about to make the following call in Postman, though the message ID will obliviously differ.
http://localhost/fmerest/v3/automations/workflows/3815f9af-bc34-4cc0-a401-be170e191f2f/8749bb57-74de-1782-9562-b66e3da4c399/message
This call requires no authorisation and should run immediately. This call will automatically return a JSON response.
Postman is installed on the virtual machines already but if you would like to find out more simply click this link https://www.getpostman.com/apps. It is available on Windows, Linux, and Mac.
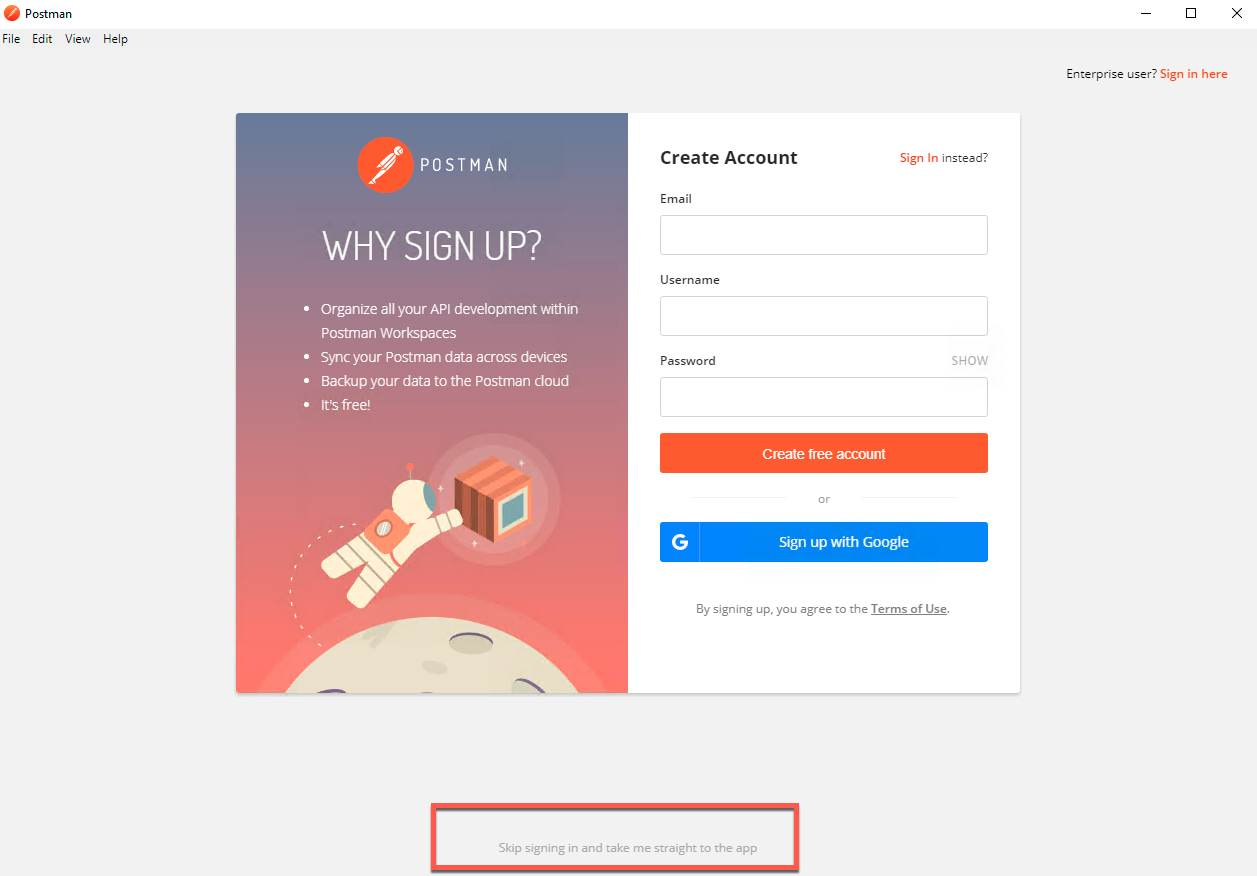
20) Open Postman
Welcome to Postman! We are now ready to make our first call to your FME Server using the URL above. Once you open Postman you should see this page. Click "Skip signing in and take me straight to the app".
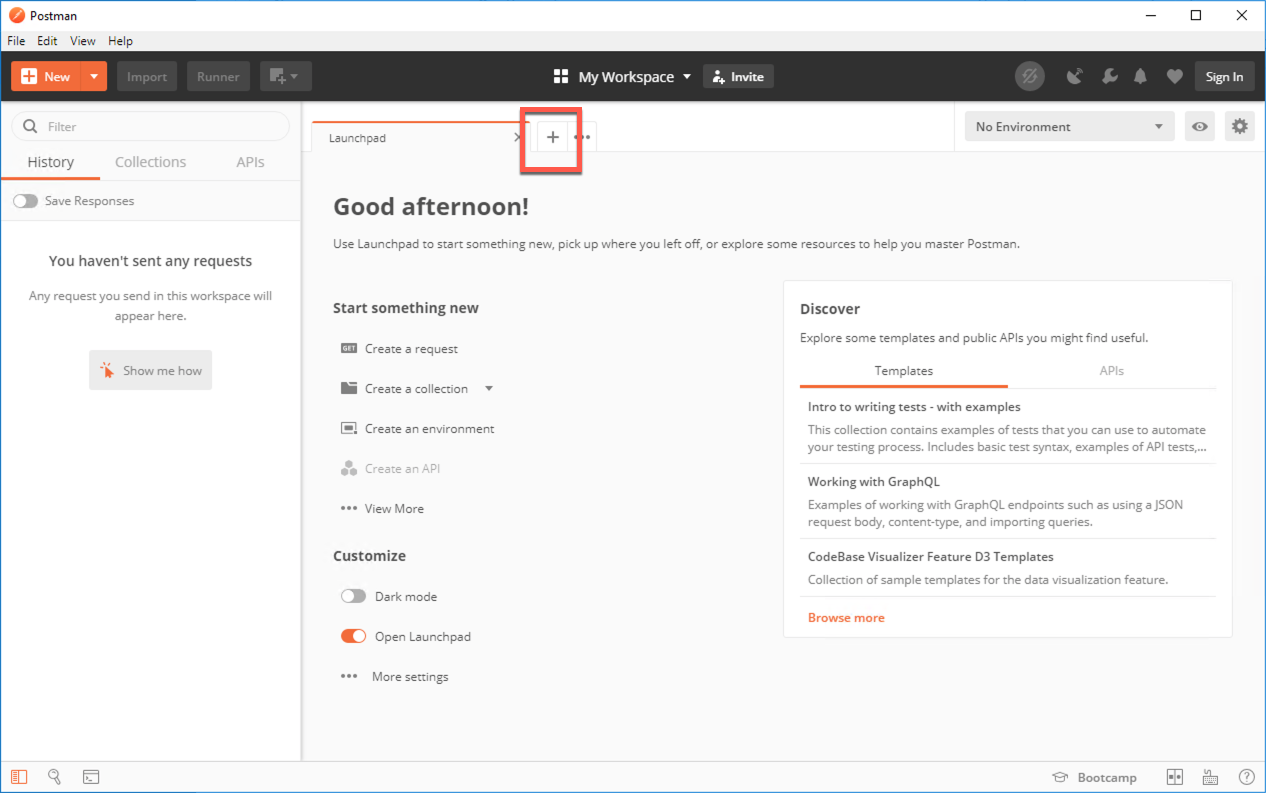
21) Create a new request
Click the plus sign on the top middle of Postman to create a new request.
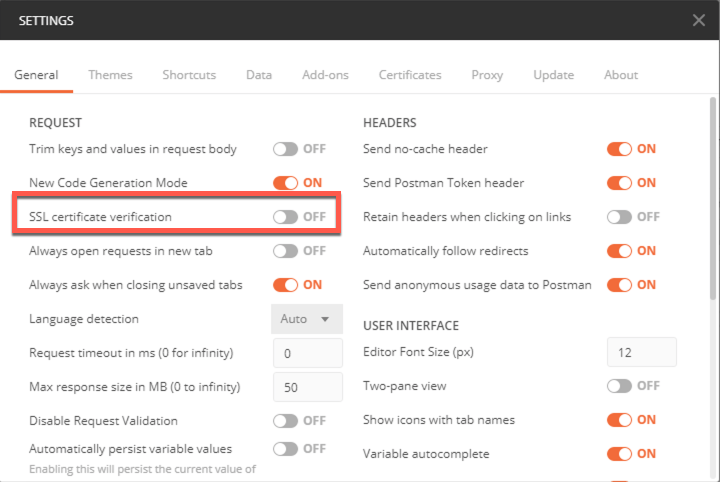
22) Turn off SSL verification
By default, Postman will attempt to verify SSL certificates. Since, we are using an FME Server that uses a self signed certificate so we will need to turn this setting off.
To turn off the setting, go to File > Settings. Find, SSL certificate verification and switch the setting to OFF.
Click the X in the top right hand corner of the Settings page to exit this dialog.
23) Copy the Webhook URL into the toolbar
Copy the URL into the toolbar and change the request method to POST.
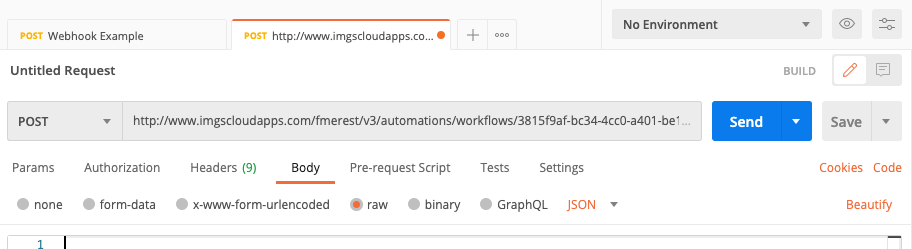
Add the JSON message we have been using for testing with previously, by going to the Body tab and choosing the raw option and pasting the message into the window.
{
    "eventType": "addData",
    "feature": {
        "result": {
            "globalId": "{BC550449-E118-48B8-81A7-39F0F3D11CE8}",
            "objectId": 20,
            "success": true,
            "uniqueId": 20
        },
        "layerInfo": {
            "id": 0,
            "name": "surveyPoint"
        }
    }
}
It should look like the following.
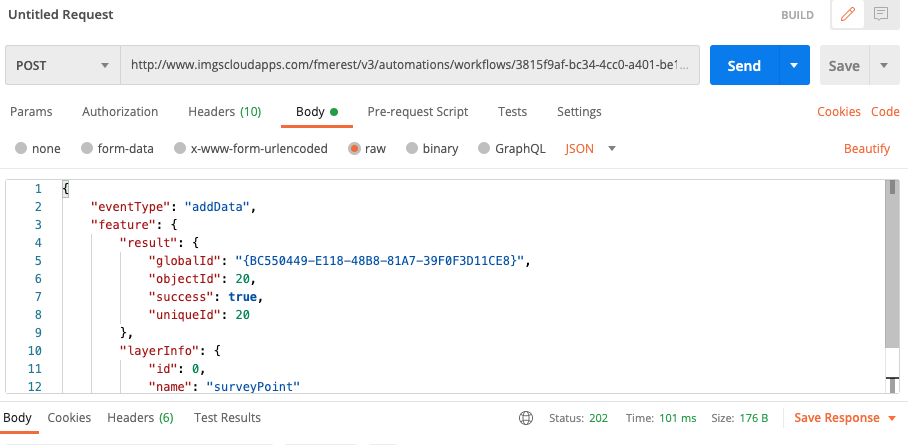
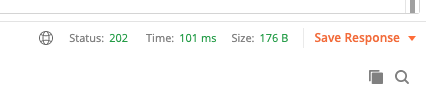
Click on Send and Confirm that the Status is 202 to show it successfully sent.
24) Confirm The Asset Report Was Written
Go to FME Server and look in the Temp Folder you should see that the StreetLight Report has been created. If not go to the Automation and review its log and the FME Jobs.
Having run one report try changing the JSON to send a different GlobalID to get a different report generated.
| Valid GlobalIDs for Testing |
|---|
| b2e49279-8168-4832-a6c9-8ea09534f92e |
| 10a7196b-8105-4c97-95f6-1dd989e26fae |
| 139c1d8c-fc79-4a3d-b719-a794ca7d3851 |
| 1e85edaf-498a-4a01-8dd0-d72451734652 |
| CONGRATULATIONS |
|
The tasks above demonstrates how you can combine Automations, Webhooks and ESRI to produce automated outputs based on actions on ArcGIS Online. Whilst we've used an Asset report example here the web hooks allow all manor of processes to be triggered in response to changes to features held within AGOL layers. |