| Exercise | Retry Failed Workspaces |
| Overall Goal | To rerun a Workspace that has Failed on FME Server |
| Demonstrates | A workflow that will retry a workspace on failure of the initial workspace |
| Completed Workspace | C:\FMEData2020\Workspaces\IMGS_ArcGIS\fmeserver_retryonfail_complete.fmw |
One common problem when reading from or publishing to is the AGOL connection failing due to something outside of FME's control. Typically this is an error message from AGOL to retry the connection later.
The workspace template built here helps mitigates failures due to this using the automation functionality within FME. A similar approach is possible in earlier versions of FME using the classic Notifications but it is harder to set-up whereas the automations allow a quick and reusable pattern to be created.
NOTE: FME Server may not be started on your training instance. To check it is browse to http://localhost/fmeserver in a web browser. If you get an error message go to the Windows Start Menu and from the available application select Start FME Server. You can continue with the remainder of the exercise whilst this starts.
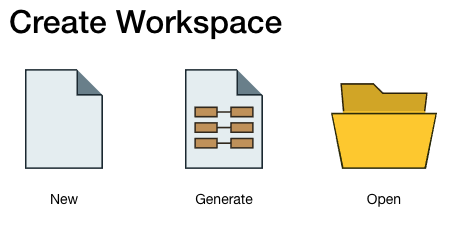
1) Create a New Blank Workspace
Open FME Desktop and select New to create a new blank canvas.
2) Create Workflow
The workspace does not need to do anything for the purpose of this test beyond reliably fail in order to generate the correct state for us to test the workflow within an automation.
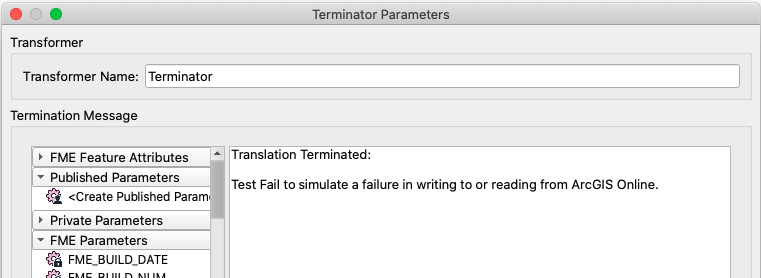
In order to deliberately stop a workspace and create a "fail" state within the automation the easiest option is to use the Terminator transformer.
The terminator transformer is a useful transformer for when you want to stop a workspace running when a feature arrives at it. A typical use would be that all data should pass a certain test or filter but if any other data is found then this is unexpected and rather than just logging or discarding the data we will stop the transformation to raise an alert to investigate why this data exists.
Add a Creator transformer to the canvas and connect a Terminator transformer to it.

We can use the default settings for the Creator as these will create a single feature but we can set a reason for the termination within the Terminator transformer that will show in the log file.
Configure the transformer as below using a suitable error message.
The workspace is very simple and will therefore execute rapidly when run on FME Server in order to make it a little more realistic we will add a Decelerator transformer to simulate the workspace processing data so we can track it in the Jobs lists.
Add a Decelerator transformer between the Creator and Terminator as below.

In the transformers parameters set the Processing Slowdown Method too Per Feature Delay and the Delay Per Feature (Seconds) to 30.

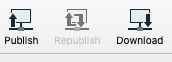
4) Publish the Workspace to FME Server
Use the Publish option in the far right of the FME Desktop menu bar to publish the Workspace to FME Server.
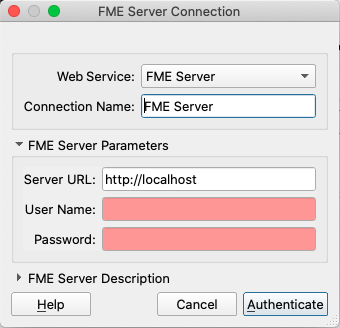
You will need to create a Connection to FME Server as the server will not have a connection if this is the first time you've published to FME Server. Select Add Web Connection and then complete the below dialogue. The Server URL is http://localhost and the User Name and Password should be in a text file on the desktop.
Continue to publish the workspace creating a suitable repository and register the workspace with the Job Submitter service.
5) Open FME Server
Go to http://localhost/fmeserver and log into FME Server using the same credentials you used to publish the workspace.
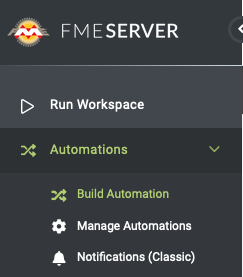
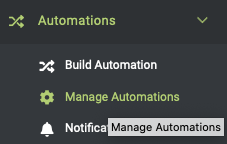
Once logged in go to the Automations section of the far left menu and select Build Automation.
6) Build Automation
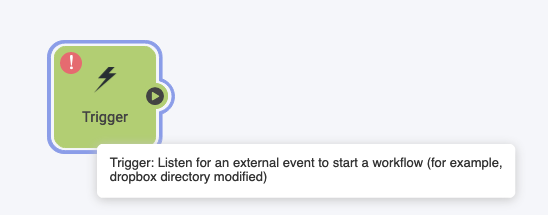
When you start the automation you will be presented with the automations canvas and an initial trigger action.
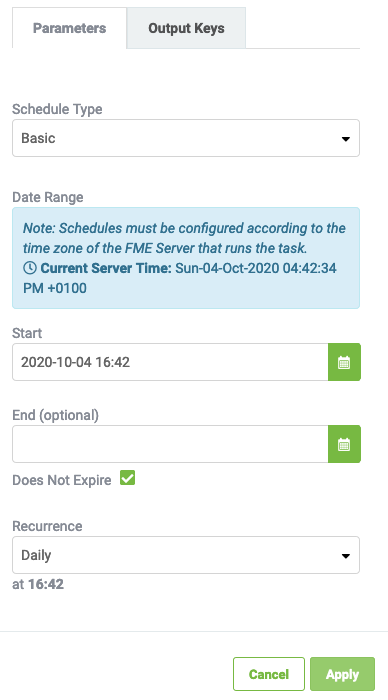
One of the typical uses of FME Server with AGOL is to run workspaces to update the data on a set schedule for example nightly. To simulate this process we will use a Schedule trigger action.
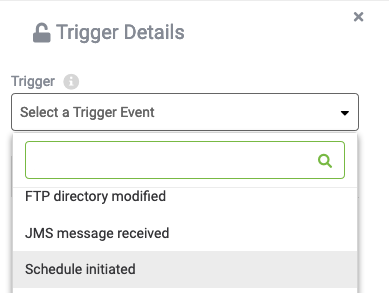
Double click on the Action to open its configuration panel, and from the Trigger drop down select the Schedule initiated option.
As we are only simulating the use of the schedule the exact time settings are not important here as we can use the trigger option in FME to manually fire the schedule for testing.
We can therefore use the settings as provided and do not need to change them from the defaults provided. So just select Apply.
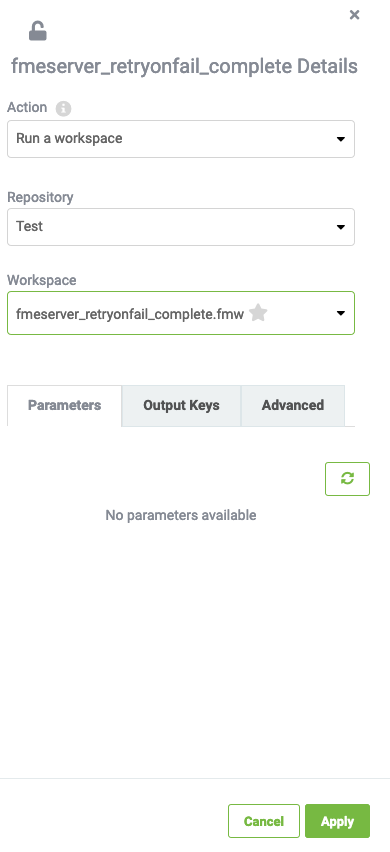
Click on Next Action and select Run Workspace from the menu on the right.
From the panel on the right select the Repository used above and the Workspace you published above then select apply.
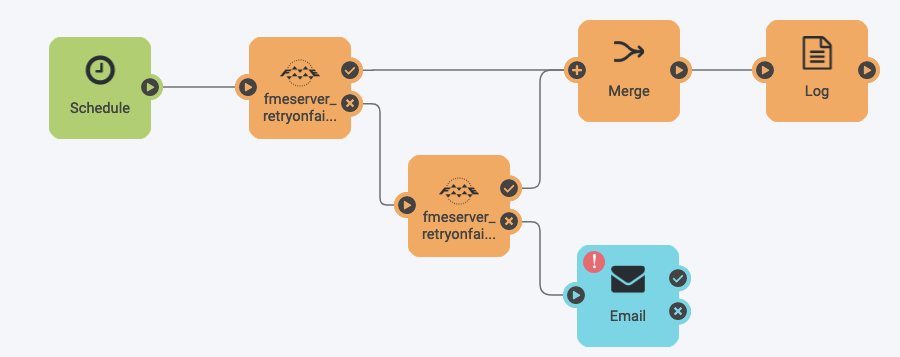
7) Add Retry Workspace
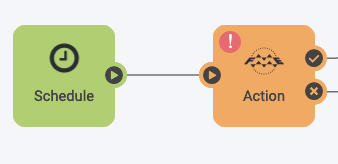
When the schedule is triggered the workspace will run and we have to port options to support the past and failed behaviours. If are AGOL workflow successfully runs we can connect any subsequent actions we wish to carry out to the passed port.
If it fails and our test workflow is engineered to fail, we want to rerun the workspace again to see if it was a temporary issue.
To do this click on the next action connected to the failed port and add another Workspace Action as below.
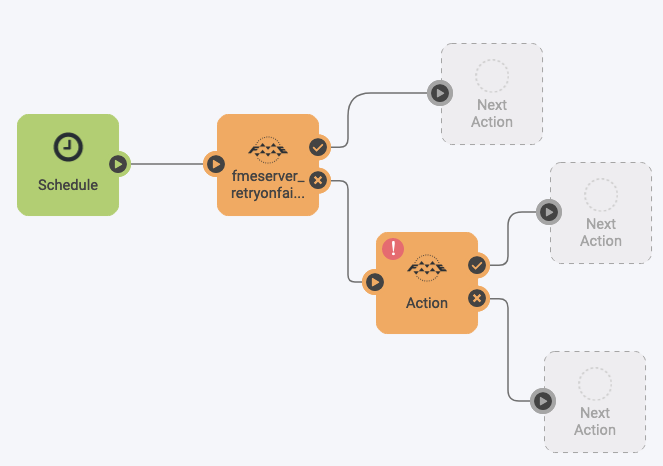
In order to tidy up the workflow we can Merge the passed messages from the two passed ports and then add a single logger. This means we can log a successful response from either of the two Workspaces that run.

8) Add Failure Reporting
If both attempts fail we want to raise an exception to alert us to this. There are a number of options for this but the simplest to implement is to send an email alert.
Add an Email Action to the failed port of the second Workspace action.
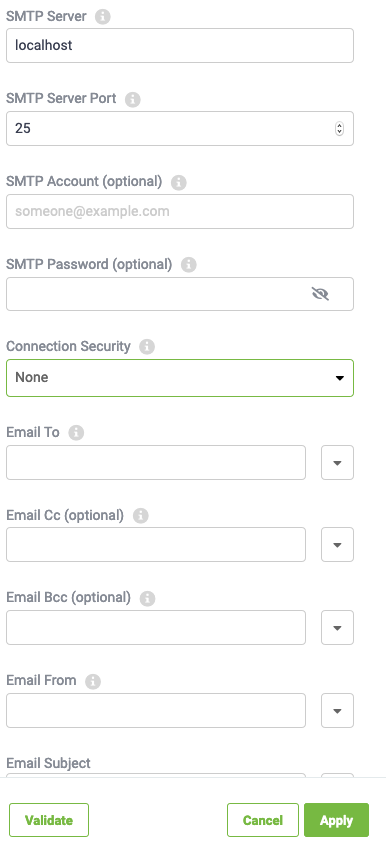
There is an email server on the local training instance that can be used to send the email. The details of the email address to send the mail too are in the next file on the desktop and the email should be seen in the Thunderbird email application on the training instance.
Configure the email server as below, the SMTP Account and Password can be left blank in this case and the Connection Security is None. The Email To address is the email address within the above text file.
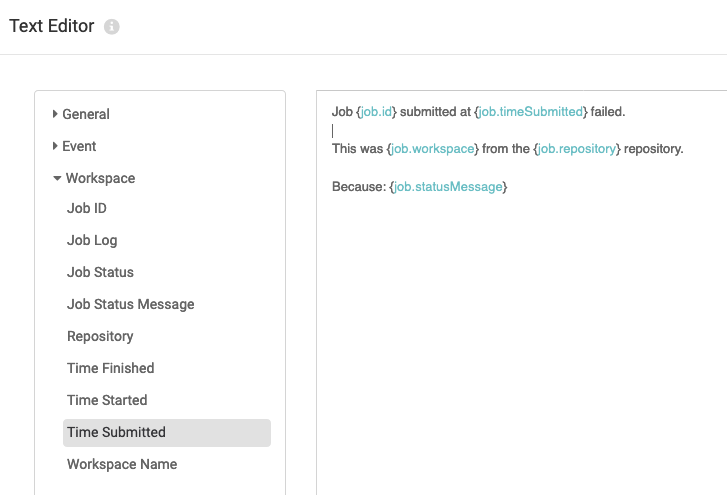
The Email body can be built up using the workspace key values which contain information on the job, and reason for failure (in this case our terminator message).
9) Test Workspace failing
From the top right select Start Automation to start the automation.
As the workspace is a schedule this will not fire until the set time, but to test this we can manually trigger the schedule.
Once the Workspace is running, select the Schedule trigger and from the panel on the right at the bottom there is now a trigger option. Select this to run the automation.

This will trigger the automation.

10) Review the Jobs and Sequence
Once the schedule is triggered you should be able to see the jobs running in the Job list and as they fail they will appear in the Job failed list.
We can also review the log file and status using Manage Automations. Select this from the menu.
From the automation view we can quickly see if there are any issues with the automation. As we have designed ours to fail we expect to see warnings. Clicking on the error count/status will take us to the log for the automation.

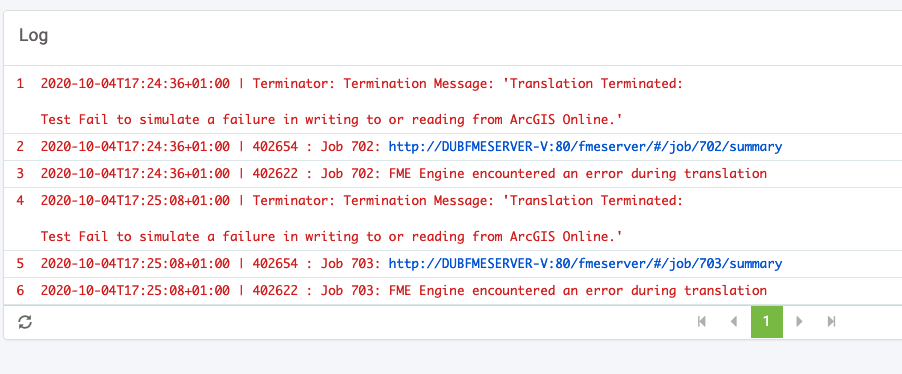
The automation log shows that it tried our first workspace but this failed, so it tried our second workspace. As this failed as well it has sent us an email to alert us that the automation failed completely. The message we included in the Terminator can be see in both cases.
The email received following the failure of both attempts containing the workspace fail key information.

| CONGRATULATIONS |
|
The tasks above demonstrate how you can use automations to build a simple retry logic for Workspaces that may fail for reasons outside of their control. It also introduces how we can log information in the Automations log to aid diagnosing potential problems within an automation, and how we can raise an email alert through the automation if something fails. Whilst a simple exercise in terms of workspace and automation its an example of a design pattern that can be reused for testing automations when things fail. This provides a way of checking that the error logic in both a Workspace and an Automation works in the expected way. |