| Exercise | ArcGIS Online Attachments |
| Overall Goal | To show how to use ArcGIS Online Attachments within FME |
| Demonstrates | To read from an ArcGIS Online layer and extract the attachments and use them within FME |
| Completed Workspace | C:\FMEData2020\Workspaces\IMGS_ArcGIS\agol_attachment_complete.fmw |
This exercise will look at how to bring in attachments from ArcGIS Online based on an asset management feature class.The dataset has a number of records relating to the condition of street lighting and this includes images of each asset.
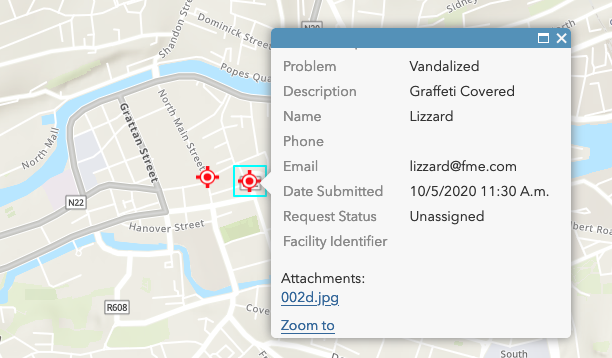
FME can bring these in for use within the workflow, as can be seen here.
The purpose of this exercise is to read this layer, bring the attachments into FME and turn them into useable features and then output this data as a basic report.
1) Create a New Blank Workspace
Open FME Desktop and select New to create a new blank canvas.

2) Read in ArcGIS Online Layer
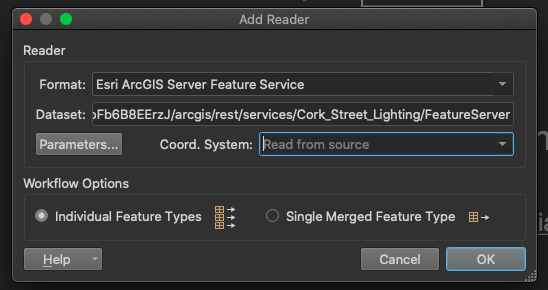
Add an Esri ArcGIS Server Feature Service reader, and set the Dataset to the below:
https://services9.arcgis.com/glE7xGfyMSglZALu/arcgis/rest/services/Cork_Street_Lighting/FeatureServer
3) Enable Attachments
By default FME does not read in the attachment information this is for performance reasons as as reading data with attachments is slower than not as you have to transfer the attachment information alongside the features. It is therefore recommended to only use this mode when reading attachments.
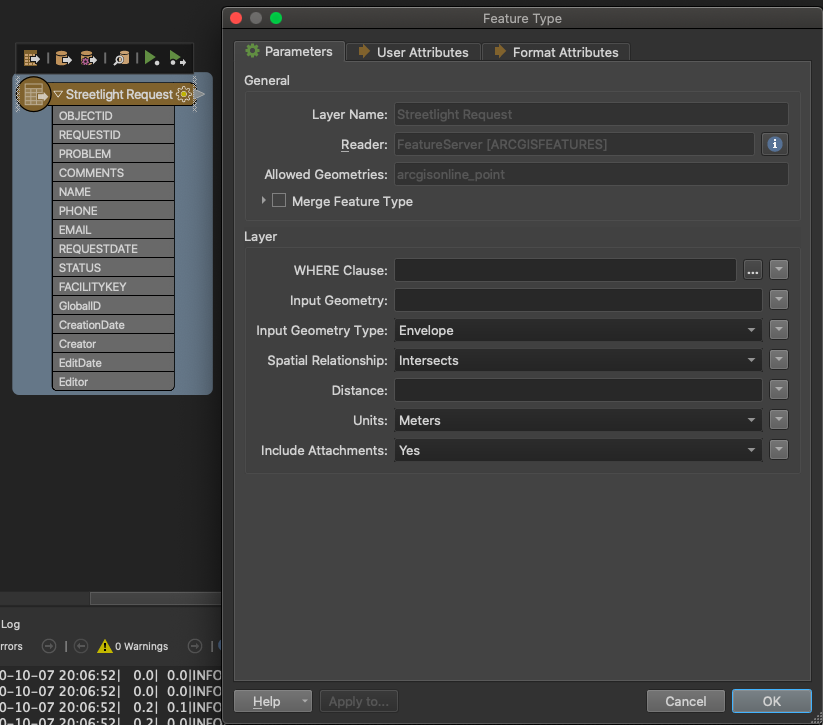
Once the feature type has been added to the canvas open its parameter window and set Include Attachments to Yes.
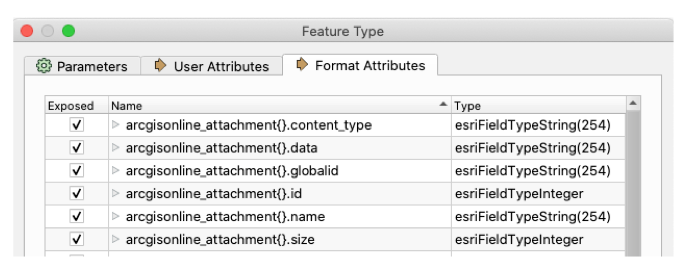
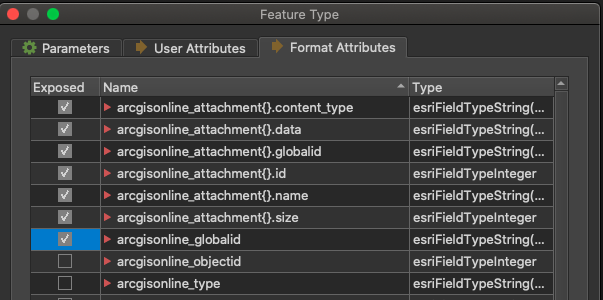
Then navigate to the Format Attributes tab and enabled all the arcgisonline_attachments{} list attributes and the arcgisonline_globalid attribute. This exposes the unique id that ESRI manages the data with and can be useful for managing or performing joins etc with the data.
Run the workspace to cache the data for the feature type, this will ensure performance and provide a chance to inspect the data. As the attachment information is stored as an FME list as there may be more than one attachment per feature the information is not visible in the standard list window (as is the case for all lists) but can be seen by selecting a feature and viewing the information in the Feature Inspection window.

4) Extract the Images
As you can see from the feature information window we have information about the attachments but we dont have a useable image that we can work with. This is because the data is stored in as a binary object in an attribute rather than a useable feature.
To access the image we first need to be able to turn our list into features. First we will remove the attributes we dont need for this step, this simplifies the workspace and helps performance.
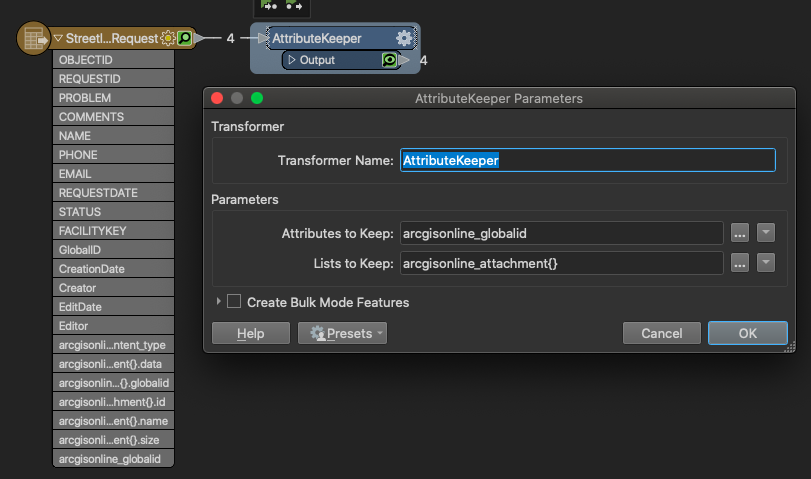
Add an AttributeKeeper and set the Attributes to Keep to arcgisonline_globalid and the Lists to Keep to arcgisonline_attachments{}. Whilst you can select the list in the Attributes section this will prompt you to choose a particular element of the list rather than all of the list so make sure to use the Lists to Keep for this task. This will ensure the whole list is kept.
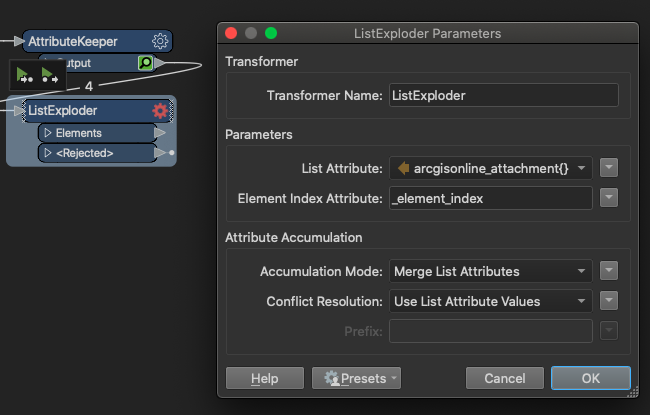
Having tidied the attributes we can now explode the features, to do this add a ListExploder transformer connected to the AttributeKeeper. Set the List Attribute to argisonline_attachment{}
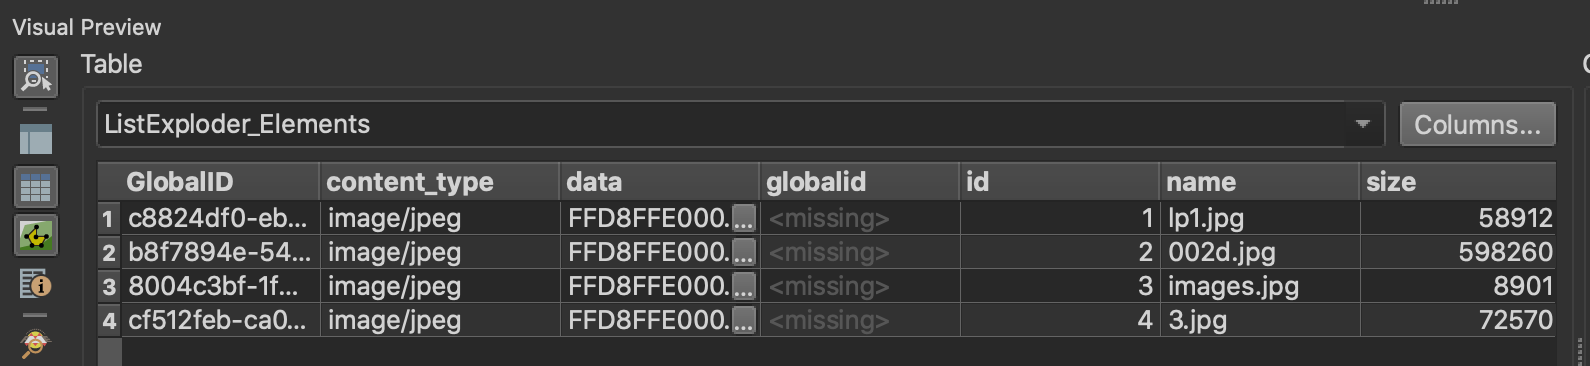
Run the transformer and you will see whilst we still have 4 features the list attributes have been demoted and are now standard attributes. Had we had more that one attachment per feature we would have more features returned at this point, with the globalID providing the common reference.
5) View the Images
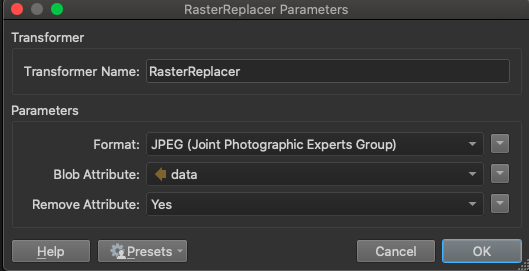
To confirm that we do in fact have images in our data we can replace the point geometry turn with our attribute information and turn our feature into a raster feature.
Add a RasterReplacer transformer and add it to the canvas connected to the ListExploders Elements port. Configure it as below, setting Remove Attribute to Yes removes the data attribute, saving memory and helping performance.
We can tell the our data is JPEG from the content_type attribute returned by ESRI. If we had mixed content we can use this to filter out the different attachment types.
Run the transformer and you should see the images in the Visual Preview. By default they will stack which is not overly helpful so you can use the SlideShow view mode in the map window and step through the images individually. Alternatively you can select all the images in the table mode and use the slide controls to move through the images.

6) Prepare the Images for Reporting
As we are going to write the images out into a HTML report we don't actually need to convert them into a raster feature as for this we actually want to keep the data as an attribute. Now we have successfully viewed the images and confirm they are what we are expecting we can delete the RasterReplacer transformer.
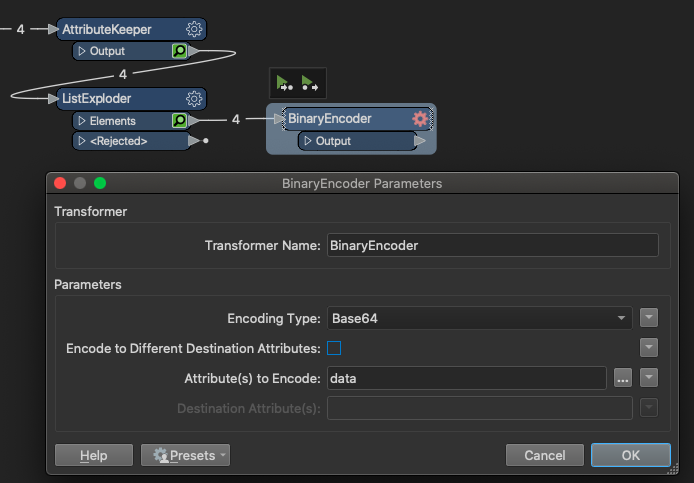
Add a BinaryEncoder transformer and connect it to the ListExploder transformer. In order to use the images within the HTML report we need to encode them into Base64, so configure the Encoding Type to Base64. We want to replace the current attribute so uncheck Encode to Different Destination Attributes. Lastly set the Attribute(s) to Encode to data.
7) Create HTML to Display the Image
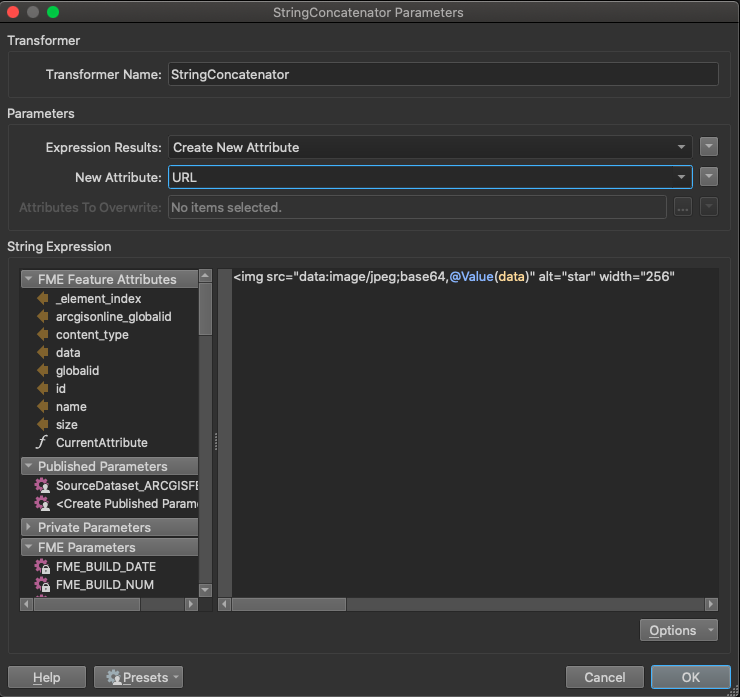
We can embed the image into our HTML and still use a HTML image tag to display it. To do this add a StringConcatenator transformer connected to the output port of the BinaryEncoder.
In the StringConcatenators parameter window set the Expression Results to Create New Attribute and the New Attribute to URL and finally add the following to the String Expression.
<img src="data:image/jpeg;base64,@Value(data)" alt="star" width="256"
The final result should look like this.
This will create the HTML code we can use in our HTML report but we now need to join our images back onto our original data so that we can include all of the asset information in our output report.
8) Join Data Together
As we exposed the arcgisonline_globalid attribute and kept it attached to our images we can use this as our join attribute to bring the images back onto the main data.
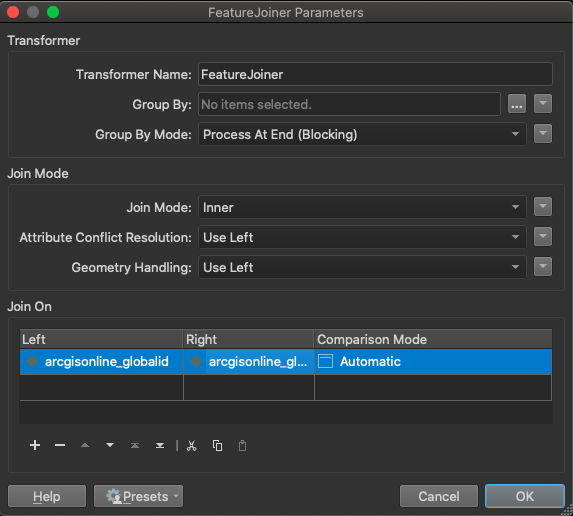
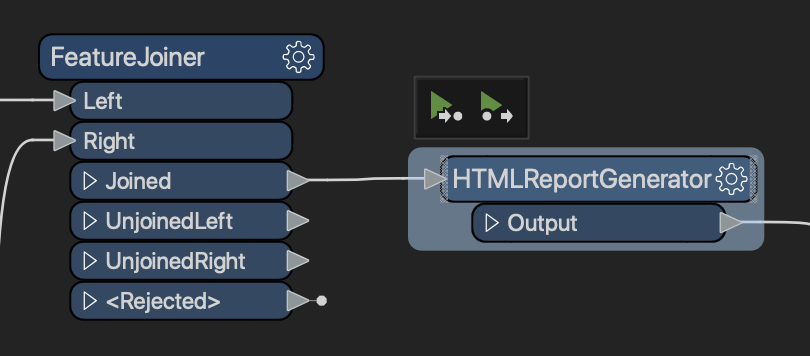
Add a FeatureJoiner transformer and connect the Left port to the ESRI Feature Type and the Right port to the StringConcatenator as shown below.

Configure the FeatureJoiner to join on the arcgisonline_globalidfor both the Left and Right join keys as below.
9) Create HTML Report
Now we have a single stream of features including the photos we can create the HTMLReport. To do this add a HTMLReportGenerator transformer and connect it to the FeatureJoiner as shown below.
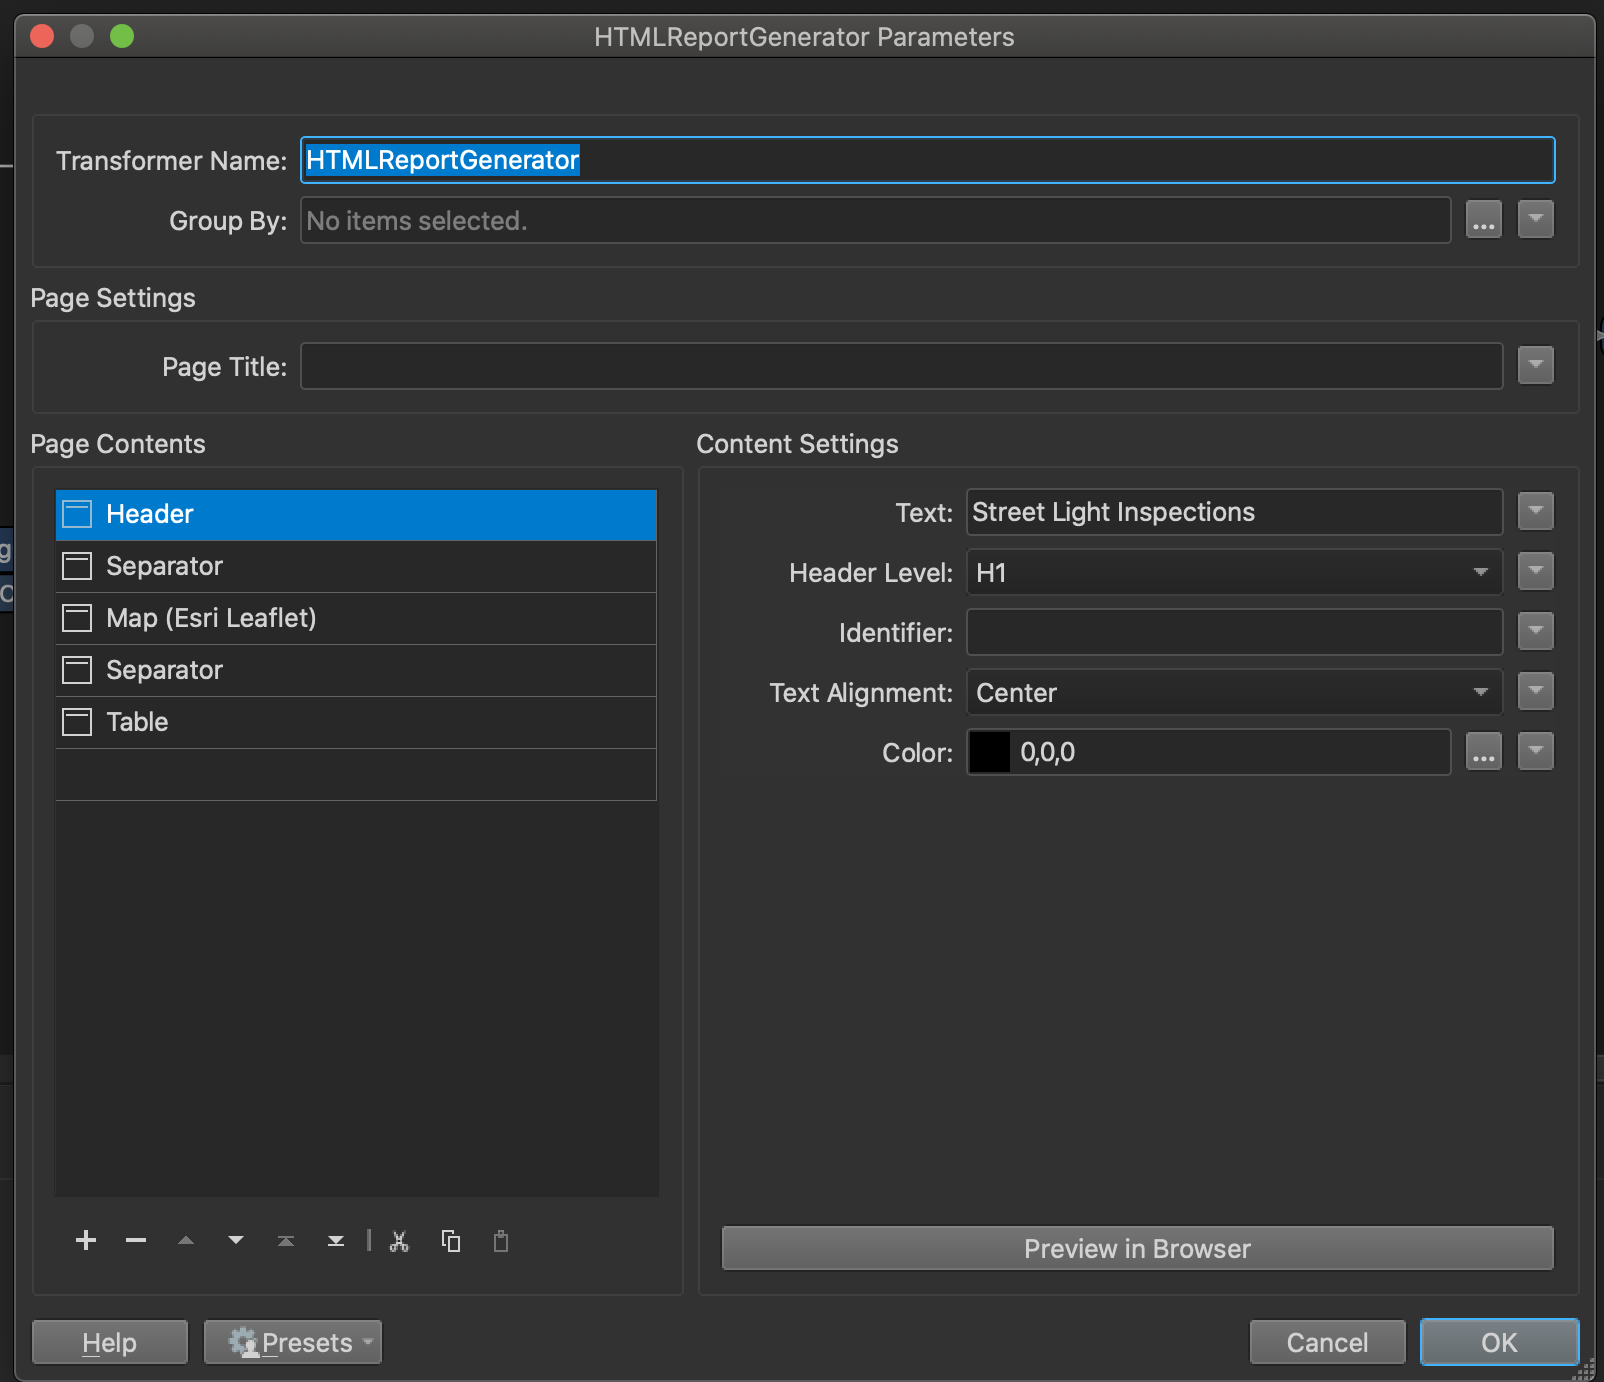
To create the HTMLReport configure the HTMLReportGenerator as shown below, including a Header, a separator, a Map (ESRI Leaflet), separator and lastly the table.
The below is a suggestion feel free to design your report as time allows.
Configure the Header section as follows,
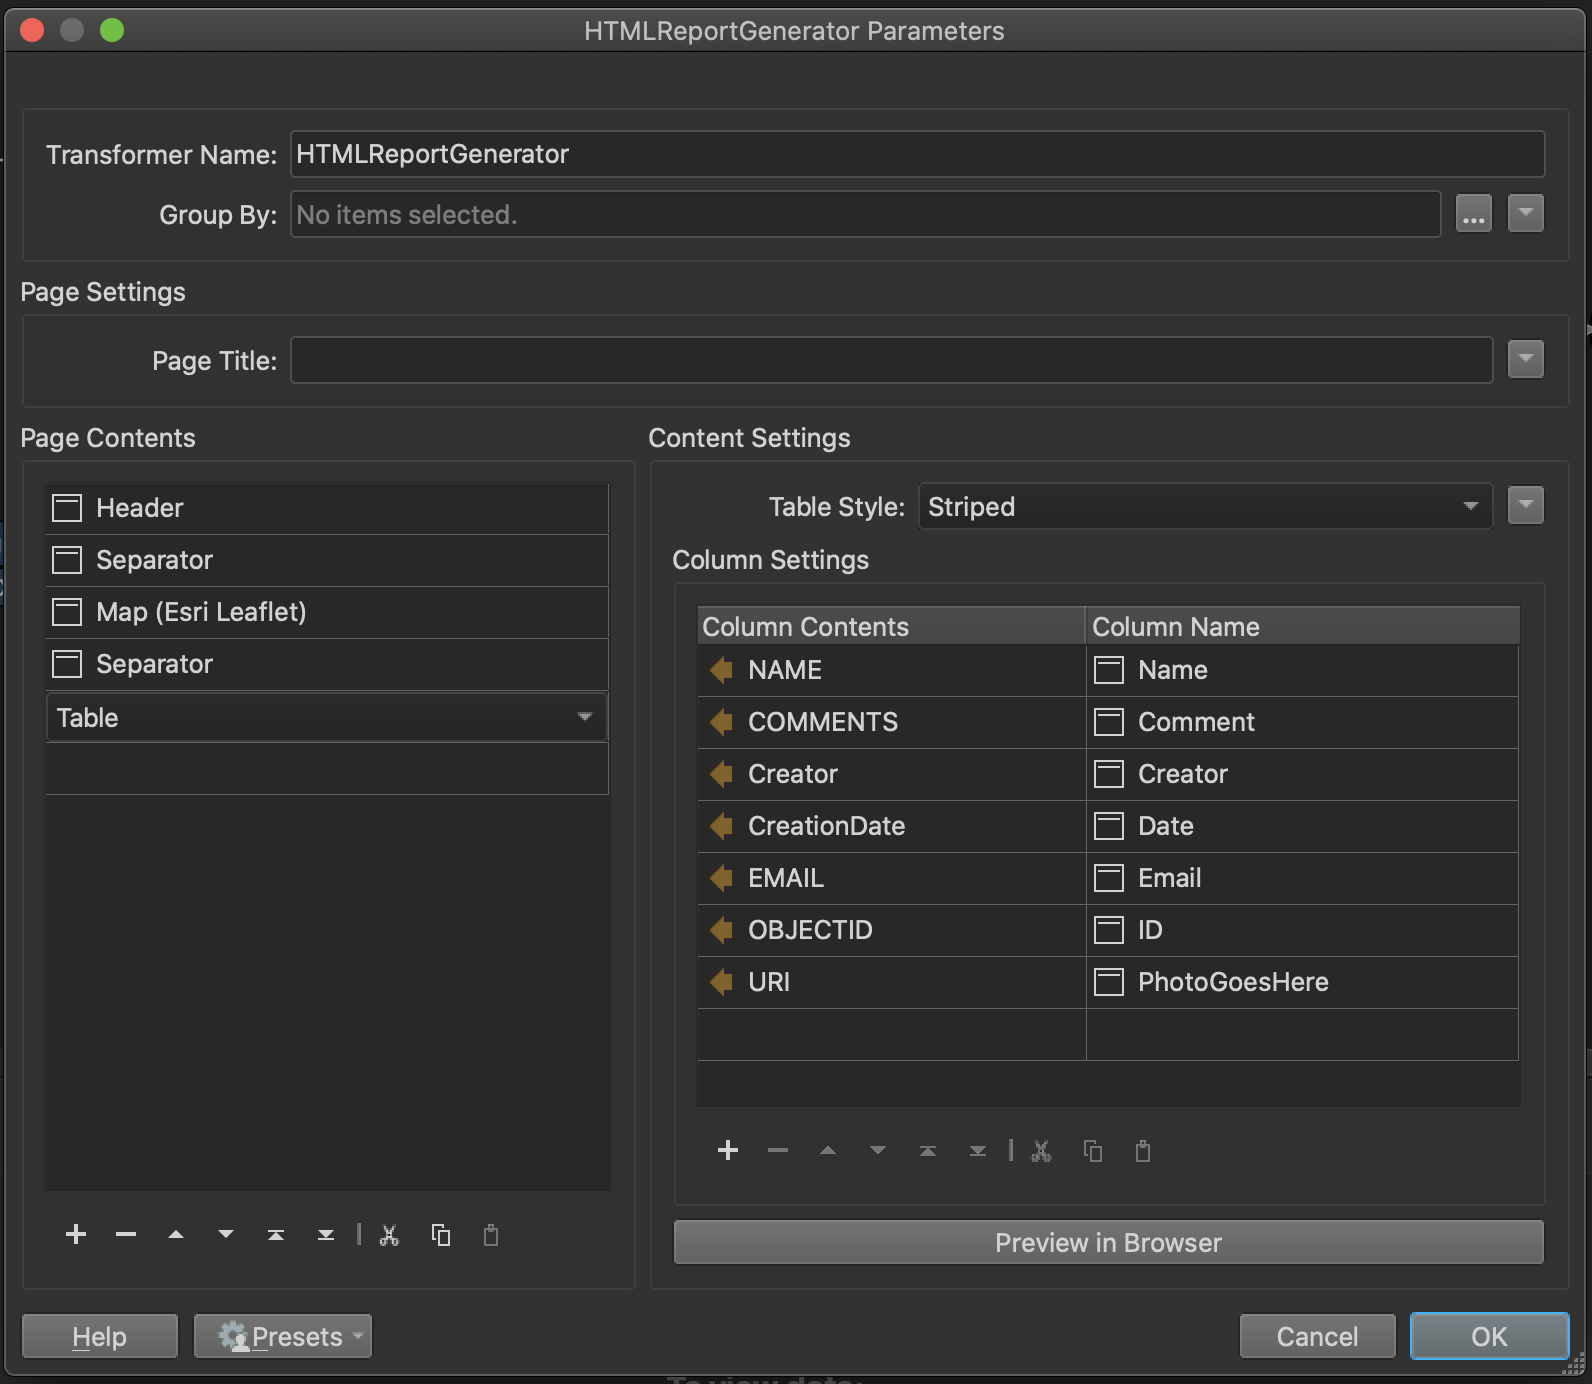
and the table section as below.
10) Layout the Report.
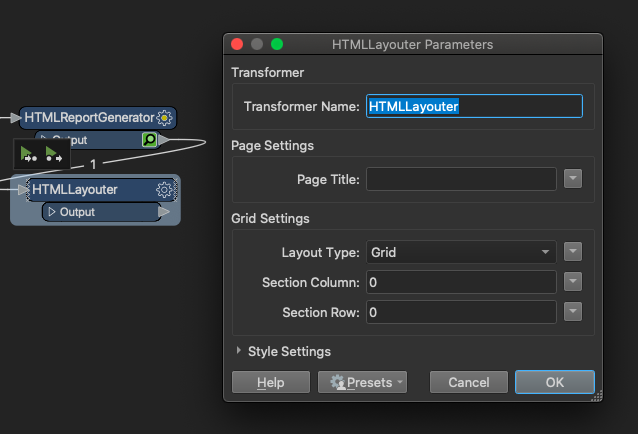
To improve the layout of the report we can use the HTMLLayouter in Grid mode which produces a nicer page layout for the output. Add the transformer and connect it to the HTMLReportGenerator then set the Layout Type to Grid and set both Section Row and Column to 0.
11) Fix the HTML Encoding
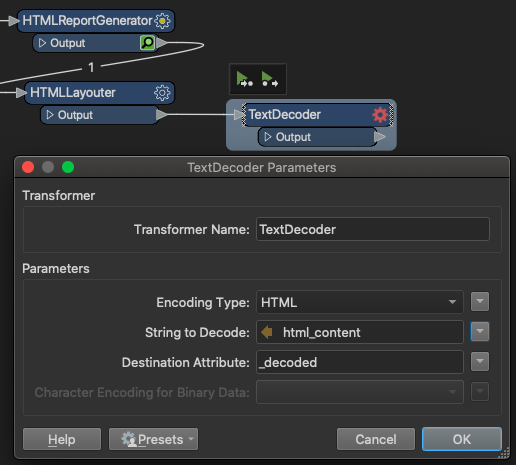
The HTML transformers encode the HTML used to display the photos which prevents them displaying correctly in the browser, to fix then encoding issue we can use the the TextDecoder transformer.
Add a TextDecoder and connect it to the HTMLLayouter, then ensure the Encoding Type is HTML, the String to Decode is html_content and the Destination Attribute remains as _decoded.
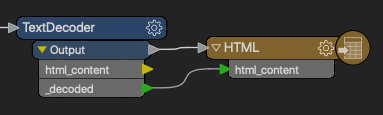
12) Add HTML Writer
Add the HTML Writer and connect the HTML feature type to the TextDecoder. Ensure that its html_content attribute is mapped to the _decodedattribute to make sure that the decoded content is written out.
If this step is missed then the images will fail to display correctly when viewing the report.
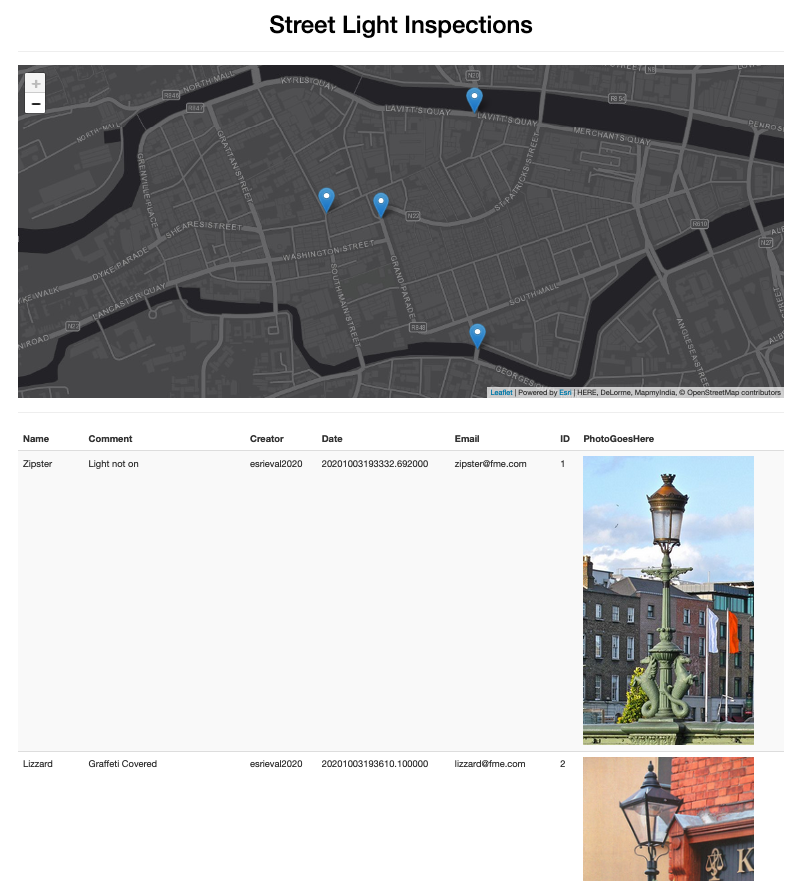
Run the report and view the output. You should see the location data from ArcGIS Online as well as the photo attachments held against each feature.
| CONGRATULATIONS |
|
The tasks above demonstrates how FME can read the attachment information from a ArcGIS Online layer and use that data in a report. Whilst this example uses photos, it is also possible to bring back any of the attachment types ESRI supports, how they are then handled by the workspace depends on the format of the attachment It is possible to use the Text Writer to write out attachments that FME doesn't natively support or cant convert within the workflow such as Word documents. FME could read the attachments down and then upload them to SharePoint for example. |